Publish (Widgets)
The Publish screen manages widgets — embeddable components that let you display Zooza booking forms, calendars, profiles, and more on your website. Use it to create widgets, configure embed codes, and customize each widget type.
Navigation: Go to Team & Settings → Publish.
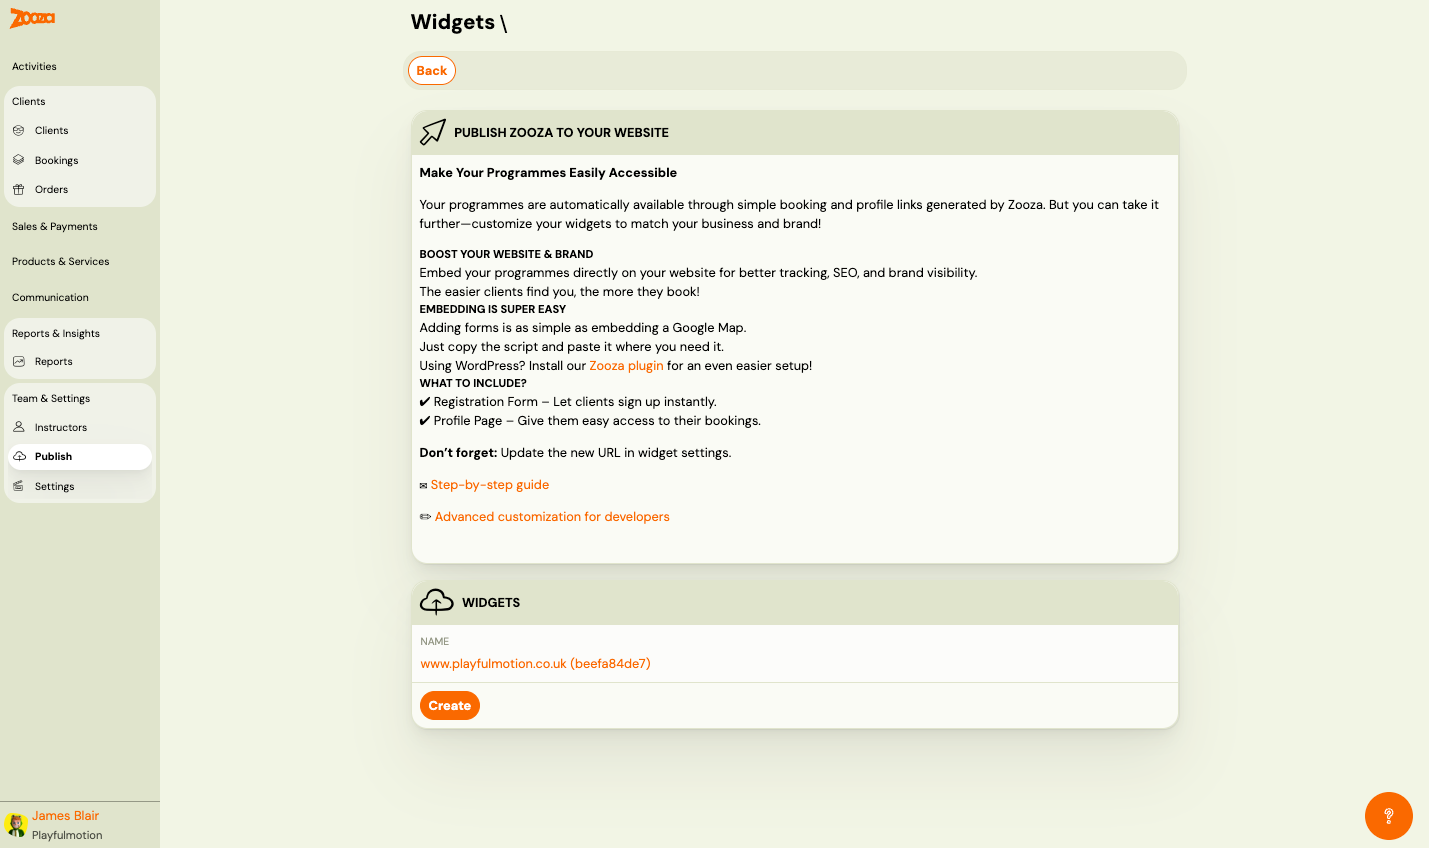
Publish Zooza to Your Website
Introductory guidance:
- Your programmes are automatically available through booking and profile links generated by Zooza — at
zooza.site/your-account-name/registerand/calendar, with no setup. Use them as a bridge until the widget is on your own site: see One link with everything you offer. - Embed programmes directly on your website for better tracking, SEO, and brand visibility.
- Adding forms is as simple as embedding a Google Map — copy the script and paste it.
- Using WordPress? Install the Zooza plugin for easier setup.
Links: Step-by-step guide and Advanced customization for developers.
Widgets
Lists all created widgets. Each shows:
| Field | Description |
|---|---|
Name | Widget name with ID (e.g. "www.playfulmotion.co.uk (beefa84de7)"). Clickable link to detail. |
Button: Create — create a new widget.
Widget Detail
Navigation: Publish → click a widget name.
Integration Type
| Option | Description |
|---|---|
| Wix | Use the Zooza app for Wix. |
| Wordpress | Use the Zooza WordPress plugin. |
| Embed | Manual embed using a script tag. |
Wix Integration
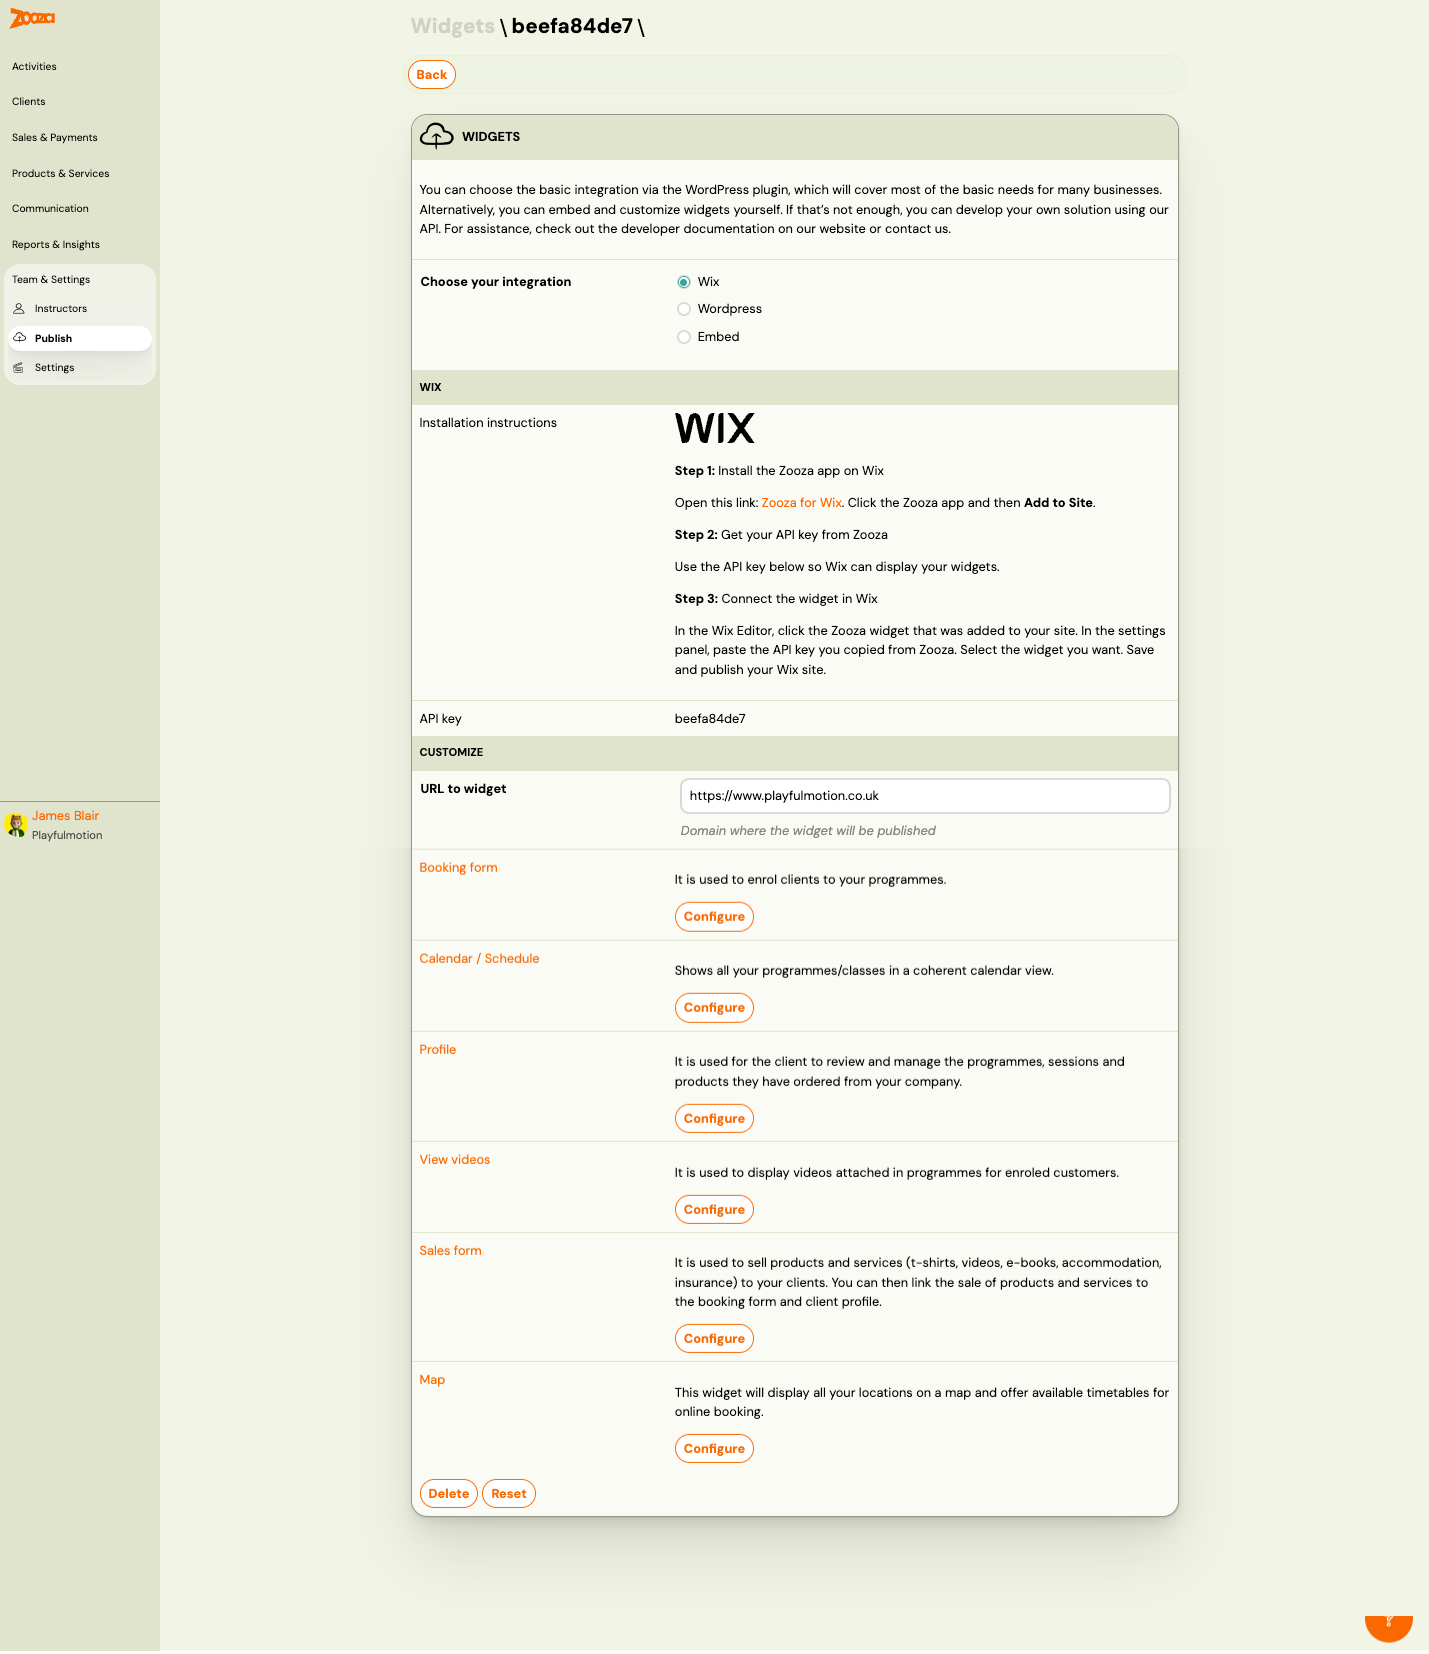
Installation steps:
- Install the Zooza app on Wix (link provided).
- Get your API key from Zooza.
- Connect the widget in Wix — paste the API key in the Wix Editor settings panel.
| Field | Description |
|---|---|
API key | Your widget's unique API key. |
Embed Integration
For the Embed option, the detail shows:
Embed Code
Tabs for each widget type: Booking Form, Calendar / Schedule, Profile, View Videos, Sales Form, Map.
Each tab displays the embed script code with a Copy button.
JavaScript apps: The embed panel also generates npm install snippets for React, Vue, Svelte, and Web Components. If your site is built as a JavaScript app, use these instead of the raw script — see Deploying widgets in a JavaScript app.
| Field | Description |
|---|---|
Deployment URL of the widget | The URL where the widget is deployed. |
Installation instructions | How to place the embed code on your website. |
| Customize embed code | Open advanced embed customization. |
Choose programmes | Select which programmes to include. Shows count of selected programmes. |
Show filter by programme | Check Yes to let visitors filter by programme name. |
View filtering by location | Check Yes to let visitors filter by location. |
Customize Section
| Field | Description |
|---|---|
URL to widget | Domain where the widget will be published. |
Available widget types:
| Widget | Description |
|---|---|
| Booking form | Used to enrol clients to your programmes. |
| Calendar / Schedule | Shows all programmes/classes in a coherent calendar view. |
| Profile | Used for clients to review and manage their programmes, sessions, and products. |
| View videos | Displays videos attached in programmes for enrolled clients. |
| Sales form | Used to sell products and services (t-shirts, videos, e-books, accommodation, insurance) to clients. Can be linked to the booking form and client profile. |
| Map | Displays all locations on a map and offers available timetables for online booking. |
Each widget type has a Configure button to open its settings.
Registration Form Settings
Settings specific to the Booking Form widget type. Open via Booking form → Configure.
Course list display
Controls how the list of Programmes is presented to the visitor before they choose one.
| Option | Description |
|---|---|
| Dropdown (default) | Classic <select> menu — compact, works everywhere. |
| Grid | Visual card grid with programme names. Better for sites with many programmes or a visual layout. |
When Grid is selected, an additional Columns setting appears (1–4). Choose how many cards appear per row.
Existing widgets keep the dropdown behaviour until you explicitly change this setting. New widgets default to Grid.
Place grouping (Merge rooms)
When enabled, the widget shows one entry per location instead of listing individual rooms within a location. Clients see the place name; the room is determined automatically by the schedule they pick.
| Option | Default |
|---|---|
| Merge rooms checkbox | On for new widgets; Off for existing widgets (opt in to change) |
To reset a registration widget to its defaults, use the Reset button. This will set Merge rooms to On.
Hide dates on block-based classes
For classes that use Blocks (where sessions are split into separately purchasable blocks), the widget normally shows the parent class start date on the registration tile. This can be confusing when a client is choosing a specific Block — the date shown is for the whole class, not their selected Block.
Enable Hide dates on block-based classes to suppress that date from the tile for any class that has Blocks configured.
| Option | Default |
|---|---|
| Hide dates on block-based classes checkbox | Off |
Actions
| Button | Description |
|---|---|
| Delete | Delete this widget. |
| Reset | Reset widget settings to defaults. |
Troubleshooting
Why is a programme not showing in the widget?
Work through this checklist in order:
- Online registration is off. Go to the programme → Settings → Online registration and confirm that online registration is enabled. If it is off, the programme will not appear in the booking form widget.
- No active classes. A programme only appears in the widget if it has at least one class with active, upcoming sessions. If all classes have ended or are inactive, the programme is hidden.
- Programme is not selected in the widget. Open the widget in Publish → widget detail → Choose programmes. Confirm the programme is included in the widget's programme list.
- Billing period has ended. If the billing period for all classes has passed, the programme will not show as bookable.
- Widget is cached. After making changes, wait a few minutes and do a hard refresh (Ctrl+Shift+R or Cmd+Shift+R) before checking again.
Why is the Register button inactive or missing?
| Symptom | Likely cause | Fix |
|---|---|---|
| Button shows "Register" but is greyed out | Class is at full capacity | Increase class capacity or add a waiting list |
| Button shows "Express interest" instead of "Register" | Online registration is closed but interest collection is on | Open online registration in programme settings |
| No button at all | Online registration is off | Enable online registration in programme settings |
| Button works but shows error | Client is already registered | System prevents duplicate bookings |
How to change the order of programmes in the widget
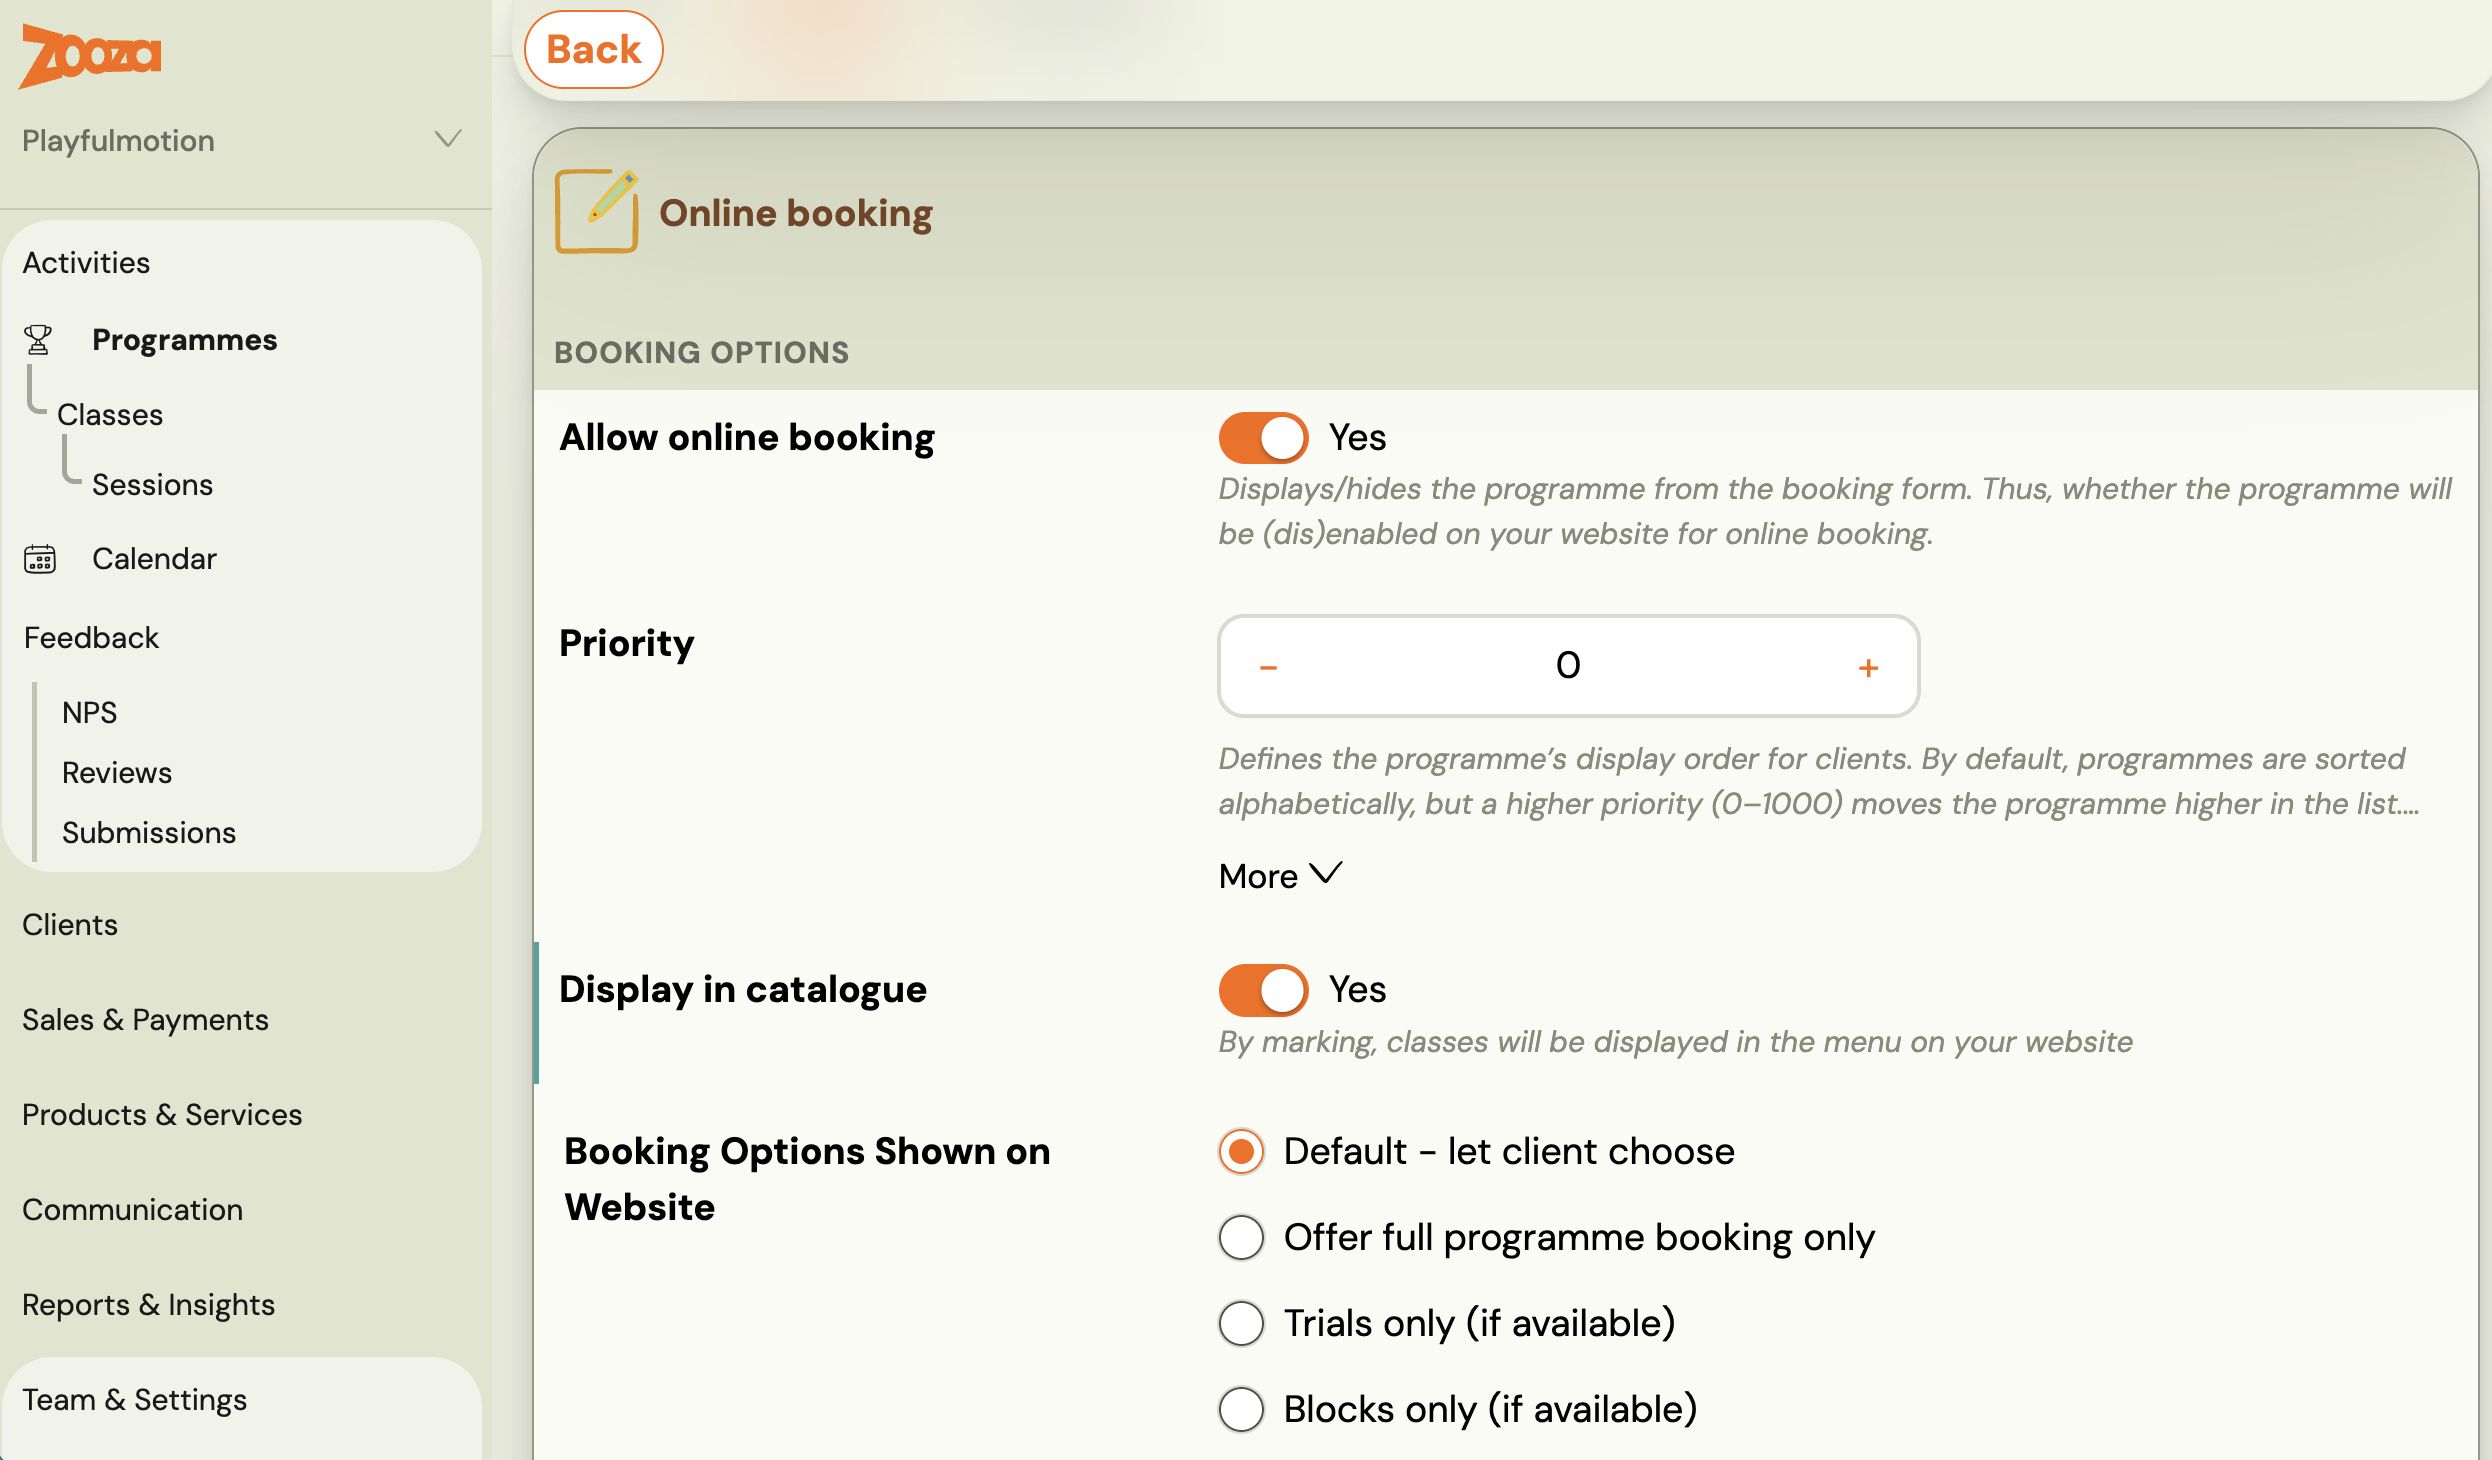
Each programme has a Priority field that controls where it sits on the booking form. Go to Programmes → open the programme → Online Booking → Edit and set it. The range is 0–1000, and the default is 0, which sorts alphabetically.
A higher number is shown first. This is the part that catches people out: 1 does not mean "first in the list". To pull a programme to the top, give it the biggest number, not the smallest. The hint under the field says so, but it is easy to read past and assume the list is numbered 1, 2, 3.
Two other things affect what the visitor sees:
- Choose programmes in the widget hides anything you do not select, whatever its priority.
- Leaving everything at 0 keeps the list alphabetical, so renaming still works if you would rather not use priorities at all.
Priority orders programmes, not the classes inside them. There is no setting that reorders the class list within a programme. Put the day and time in the class names instead — see Booking form settings.
Related
- Deploying Zooza on Website — step-by-step embedding guide.
- Customizing widgets — step-by-step customizing HTML and view settings.