Summer camps creation
Creating summer camps
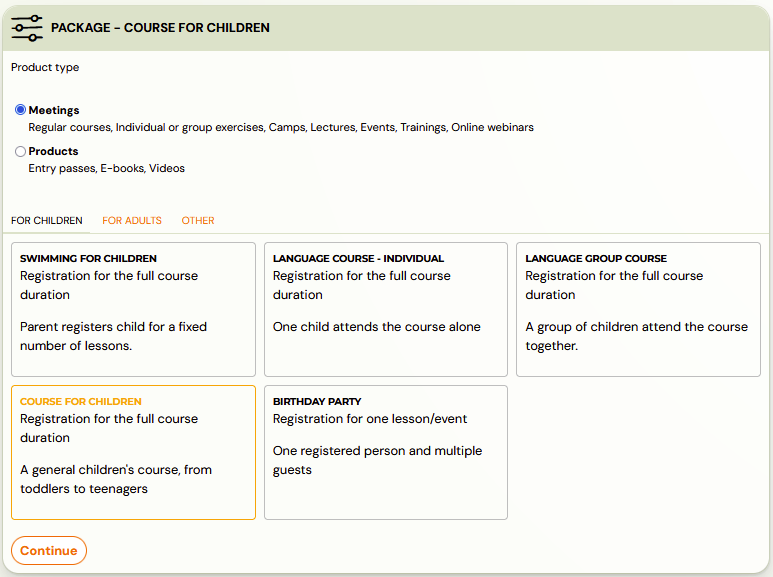
If you are creating an offer for summer camps for week-long camps, you will create the offer as follows:
- Create a new programme, in the Programmes section click on the New Programme button and select Meetings
- Select the booking type – booking for the entire duration of the programme, as in this case you wish to create a camp where clients sign up for a full week
- Click Continue
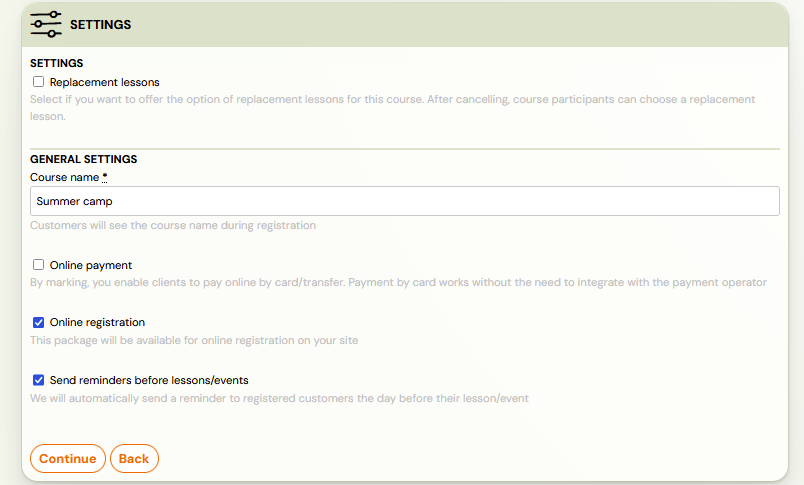
- Then fill in all required fields and click Continue. Choose a name such as Summer Camp, Summer Dance Camp, Day Summer Camp, or whatever suits you. This name is visible to your clients.
- Then create the class(s) according to your wishes by clicking the Add button and fill in the required data for the class. You can create multiple classes at once. Click Continue again to go to the next step.
- Fill the class with dates according to your wishes, if you can determine them right away. Classes need to be filled with terms individually. If you don’t want to create dates, the class will be created as the lead collection class and you can add dates afterwards.
- Detailed instructions on how to create sessions can be found in Edit sessions in programmes.
![]()
Next, fill in all the important fields in the programme settings. You can open each subpage by clicking on “edit” in that subpage.
Edit summer camp settings
- Fill in the price and payment method.
- If you offer clients the option to pay in installments or offer a discount in the case of siblings, activate payment templates in the “price and payments” section. If you do not have the necessary payment template created, create one in the “settings” section in the left menu at the bottom, under “payment templates” and activate it for the programme.
- Set the display in the online registration on your site. Decide how late bookings will be approved – manually or automatically with an aligned price
- Manage your make-up sessions settings, although chances are you don't want to have make-up sessions enabled for day camp.
- Programme Settings – describe the camp, or insert a URL link to click through to your page where there is more information about the specific camp
- In the programme settings section, select the “for children” option and the booking fields will automatically be renamed from “name” to “parent’s name”. You set the “child’s name” field in the extra fields.
- Add tags for easier searching and choose a color for this programme – camp. It will be prettier when it’s more colorful. 🙂
- Set up extra booking fields to collect information about the child, allergies, or other information you need to collect when registering a client. Check the box and enter your own name. This will be displayed to the client during online registration. There are also extra untitled fields below, you can use these to rename according to your requirements – child’s allergies, child’s experience with dancing or other.
![]()
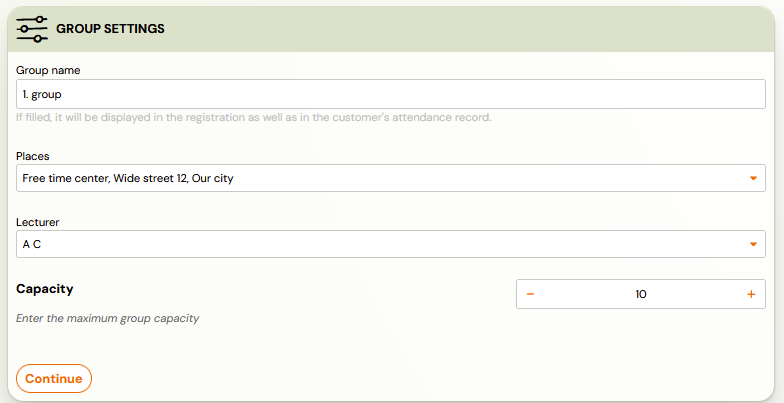
Then create specific classes for this programme, i.e. in the case of camps these will be your week-long tours.
Class creation
If you did not do so in the initial programme setup, you still have this option within the programme settings. Click on the “New Class” box, located either at the top right or at the bottom under the settings for the programme, and start creating a specific class of children who will attend a specific week,
- Fill in the name of the class – if the topics change from one tour to another. For example, one week will be a camp focused on the theme of Space so name the specific class/tour. If you have all the tours exactly the same, you can leave the class name blank. The class will pull information from the programme title and differentiate themselves from the others with different dates or location.
- Choose your billing period. If you don’t have a billing period created, create one in the “Settings” section in the bottom left menu, under “Billing Periods.”
- Choose the place where the camp will take place. If you don’t have the space you need, create one in the “settings” section in the bottom left menu, under “locations.”
- Choose a instructor for a specific tour. If you don’t have the necessary instructor created, create one in the “settings” section in the left menu at the bottom, under “accesses.”
- If you want, choose a rate for the instructor, for easier calculation of the remuneration for the instructor. If you have not created the necessary rate, create it in the “settings” section in the left menu at the bottom, under “instructors’ rates.”
- Determine your capacity for the tour.
- You do not need to enter the price of the programme and, if applicable, the registration fee if you have already filled in these details in the programme settings. If there is a different price for the tour you are creating, enter it and that price will be displayed.
- If you offer clients the option to pay in installments or offer a discount in the case of siblings, activate payment templates. If you do not have the necessary payment template created, create one in the “settings” section in the left menu at the bottom, under “payment templates” and activate it for the programme.
- Click on “create.”
![]()
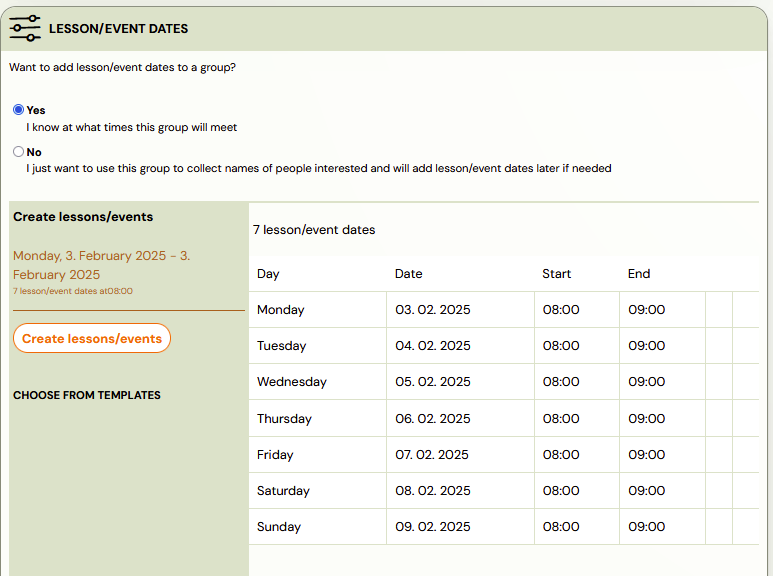
Add specific dates for a particular class / tour.
Sessions creation
In the case of a day camp it will be 5 dates (Mon-Fri) of one day (e.g. 8 hours from 8am to 4pm)
- Click on Add terms
- Choose a date – the date of the first term for a specific tour
- Choose a time – the start time of each date, day. When are the children due to arrive at the camp?
- Choose the length of the term in minutes – the time the children stay in the camp. For example 480 minutes if it is 8 hours. The end time of the day camp is calculated.
- Choose a repetition count of 5 if you are creating weekly rounds for days Monday through Friday
- The terms will be automatically displayed and when you are satisfied with them, click on “OK” and then on “Create terms”
Other programme settings
![]()
Once you have created the terms, you can still adjust other settings in the specific class.
For example, you add a second instructor. Insert documents, links or videos that the client can easily view in their profile. Add your tags for easier searching or class notes.
How to easily create your next tour?
You don’t have to laboriously create a new class, in your case another tour of your camp, from scratch. Click the “Copy” button and simply copy the class.
Other dates, place or instructor can be adjusted afterwards. The system guides you through the steps before you finish copying.